ENIB 2020 : Mimic2000
Sommaire
Qui sommes nous
Etudiant à l'ENIB
Que fait ce projet ?
Recréation Mimic Chest
In the Dungeons & Dragons fantasy role-playing game, the mimic is a type of fictional monster. It is portrayed as being able to change its shape to disguise its body as an inanimate object, commonly a chest. The mimic has a powerful adhesive that holds fast to creatures who touch the creature, allowing the mimic to beat the creature with its powerful pseudopods. The mimic was introduced in the first edition Advanced Dungeons & Dragons game's original Monster Manual. The mimic has appeared in subsequent editions. Several variants of the creature have been introduced, with a variety of abilities and sizes.
Le Coffre est en bois et le haut du coffre est en carton
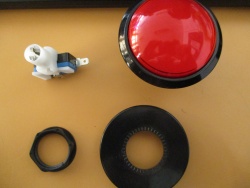
Dans le coffre il y a un bouton rouge, si une personne appuie dessus le haut coffre se referme sur la main de celle-ci.
Le haut du coffre s'ouvre au bout de quelque seconde.
Liste des composants
- Résistances(10k Ohms X1 et 220 Ohms X8)
- Bouton
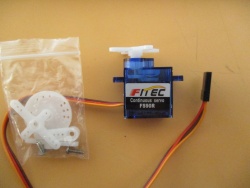
- Micro Servo moteur à Rotation Continue FS90R
- Alimentation Externe
- Arduino Nano
ou
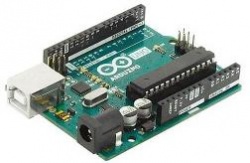
- Arduino UNO
Montage
Réalisation du coffre
Nous avons construite notre le coffre en découpant dans des planches les quatre cotés du coffre ainsi que le fond.
Le haut du coffre est fait en carton afin que le servo moteur ne force pas trop.
Afin de cacher la partie électronique, un double fond a été réalisé où le bouton est fixé.
Câblage électronique
Habillage
Code
int button = 13;
int button = 13; // button pin
int servo_control = 9; //servo pin
int pause = 1000; // delay before open chest
bool open_top = false; // command to open the chest
bool close_top = false; // command to close the chest
bool secure = false; // secure to desactivate the button during the closing and the opening of the chest
int time_open = 500; // time to open the chest
int time_close = 500; // time to close the chest
int open_sens = 0; // sens of rotation of the servo to open the chest
int close_sens =180; //sens of rotation of the servo to close the chest


#include"Servo.h"
#include <Servo.h>

Servo myservo; // create servo

void setup() {
  // put your setup code here, to run once:
  pinMode(button, INPUT);
  Serial.begin(9600); // enable serial print
  myservo.attach(servo_control); // add servo
  myservo.write(90); // stop the servo
}// end of setup

void loop() {
  // put your main code here, to run repeatedly:
  if (digitalRead(button) && secure == false) {
    Serial.println("button is ok"); // test the functionment of the button
    open_top = true;
    secure = true; // desactivation of the button
  }

  if (open_top == true && close_top == false) {// open box
    myservo.write(open_sens); // order to open the chest
    delay(time_open); // time during the open of the chest
    myservo.write(90); // stop the servo
    open_top = false;
    close_top = true;
  }

  if (open_top == false && close_top == true) {// close box
    delay(pause);
    myservo.write(close_sens);// order to close the chest
    delay(time_close); // time during the close of the chest
    myservo.write(90); // stop the servo
    close_top = false;
    secure = false; //activation of the button
  }

}// end of loop

/*
 Micro Servo à Rotation Continue FS90R

https://boutique.semageek.com/fr/1036-micro-servo-moteur-a-rotation-continu-fs90r.html.

DESCRIPTION

Ce servo tourne à 360 degrés vers l'avant ou vers l'arrière au lieu de bouger d'une position à une autre comme un servo classique (servo à rotation continue).
Vous pouvez utiliser n'importe quel code, hardware ou librairie dédiés à des servos pour le contrôler.
C'est le servo idéal pour faire des robots mobiles simples. Il est livré avec quatre palonniers et vis de fixation.

Pour contrôler ce servo avec un Arduino, nous vous conseillons de connecter le fil de signal sur les pins 9 ou 10 et d'utiliser la librairie "servo" inclue dans Arduino IDE (voir liens ci-dessous).
La position "90" correspond à la position "stop" (impulsions de 1500µs), la position "180" correspond à la vitesse max en avant (impulsions de 2000µs)
et la position "0" correspond à la vitesse max en arrière (impulsions de 1000µs).

Ce servo peut avoir besoin d'une calibration. Il suffit pour cela de choisir la position "90" ou "stop" et d'ajuster le potentiomètre situé proche de la sortie
du câble jusqu'à ce que le servo soit immobile (le boîtier du servo est perçé à cet endroit pour y avoir facilement accès).
 */


