Beer pong : Différence entre versions
| (20 révisions intermédiaires par 2 utilisateurs non affichées) | |||
| Ligne 1 : | Ligne 1 : | ||
| − | [[Fichier: | + | [[Fichier:Beerpong.jpg|300px]] |
==Description du projet== | ==Description du projet== | ||
| − | Un jeu de beer pong nouvelle génération. Un dispositif ludique pour vous aider même après 3 grammes dans le sang. | + | Un jeu de beer pong nouvelle génération. Un dispositif ludique pour vous aider à rentrer vos boules [[Fichier:smiley.jpg|30px]] même après 3 grammes dans le sang. |
Chaque balle qui entre dans un verre l'illumine pour qu'il soit repéré et émet un son. | Chaque balle qui entre dans un verre l'illumine pour qu'il soit repéré et émet un son. | ||
| Ligne 12 : | Ligne 12 : | ||
*GOURPIL Jossua | *GOURPIL Jossua | ||
| − | * | + | *GUIGHOUX Robin |
*JOLY Leopold | *JOLY Leopold | ||
*BRANDILY Hugo | *BRANDILY Hugo | ||
| + | |||
| + | [[Fichier:images.jpg]] | ||
==Liste du matériel== | ==Liste du matériel== | ||
| − | *Red cup | + | *Red cup [[Fichier:red.jpg|30px]] |
| − | *Ruban de LED | + | *Ruban de LED [[Fichier:ruban.jpg|30px]] |
| − | * | + | *Résistance photovoltaïque |
*ARDUINO | *ARDUINO | ||
*Carte LABDEC | *Carte LABDEC | ||
| − | *Haut parleur | + | *Haut parleur [[Fichier:haut.jpg|30px]] |
| + | |||
| + | ==Étapes== | ||
| + | *Créer un code | ||
| + | |||
| + | #include <Adafruit_NeoPixel.h> | ||
| + | #define PIN 6 | ||
| + | |||
| + | int led = 2; | ||
| + | //int ruban = 10; | ||
| + | double photo = A0; | ||
| + | unsigned long previousMillis = 0; | ||
| + | |||
| + | Adafruit_NeoPixel strip = Adafruit_NeoPixel(150, PIN, NEO_GRB + NEO_KHZ800); | ||
| + | |||
| + | void setup() { | ||
| + | Serial.begin(9600); | ||
| + | pinMode(led,OUTPUT); | ||
| + | //pinMode(ruban, OUTPUT); | ||
| + | pinMode(photo, INPUT); | ||
| + | |||
| + | strip.begin(); | ||
| + | strip.show(); // Initialise toute les led à 'off' | ||
| + | } | ||
| + | |||
| + | void all(int temps, int r, int v, int b) | ||
| + | { | ||
| + | for(int i = 0 ; i < 150 ; i++) | ||
| + | { | ||
| + | strip.setPixelColor(i, r, v, b); | ||
| + | } | ||
| + | strip.show(); | ||
| + | delay(temps); | ||
| + | } | ||
| + | |||
| + | double | ||
| + | etalonnage() | ||
| + | { | ||
| + | return analogRead(photo); | ||
| + | } | ||
| + | |||
| + | void loop() { | ||
| + | unsigned long currentMillis = millis(); | ||
| + | double limit = etalonnage(); | ||
| + | limit-=10; | ||
| + | Serial.println(limit); | ||
| + | if(analogRead(photo)<limit) | ||
| + | { | ||
| + | delay(500); | ||
| + | while(analogRead(photo)<limit) | ||
| + | { | ||
| + | // La première valeur correspond au temps, la seconde à l'intensité du rouge, la troisième au vert, et la quatrième au bleu | ||
| + | all(1, 255, 255, 255); | ||
| + | tone(12,50,2000); | ||
| + | } | ||
| + | digitalWrite(led, HIGH); | ||
| + | } | ||
| + | } | ||
| + | |||
| + | |||
| + | *Câbler l'ARDUINO | ||
| + | |||
| + | [[Fichier:Arduino-1-.jpg|300px]] | ||
| + | |||
| + | |||
| + | *Câbler le ruban de LED | ||
| + | |||
| + | ==Résultat final== | ||
| + | |||
| + | |||
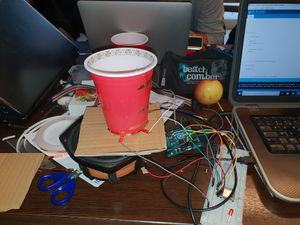
| + | [[Fichier:projet2.jpg|300px]] | ||
| + | |||
| + | [[Fichier:projet1.jpg|300px]] | ||
| + | |||
| + | |||
| + | [[catégorie:enib2019]] | ||
| + | |||
| + | |||
| + | [[catégorie:enib]] | ||
| + | [[Catégorie:led]][[Catégorie:ruban de led]][[Catégorie:WS1812B]] | ||
Version actuelle datée du 3 décembre 2023 à 11:11
Description du projet
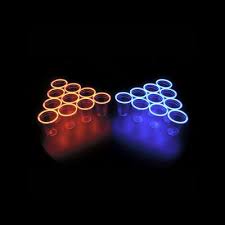
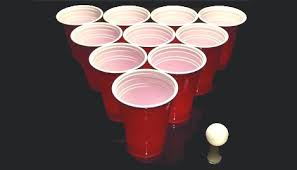
Un jeu de beer pong nouvelle génération. Un dispositif ludique pour vous aider à rentrer vos boules ![]() même après 3 grammes dans le sang.
même après 3 grammes dans le sang.
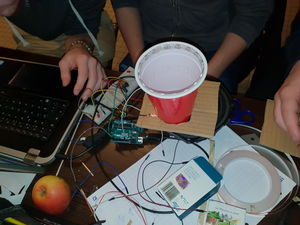
Chaque balle qui entre dans un verre l'illumine pour qu'il soit repéré et émet un son.
Equipe du projet
- GOURPIL Jossua
- GUIGHOUX Robin
- JOLY Leopold
- BRANDILY Hugo
Liste du matériel
Étapes
- Créer un code
- include <Adafruit_NeoPixel.h>
- define PIN 6
int led = 2; //int ruban = 10; double photo = A0; unsigned long previousMillis = 0;
Adafruit_NeoPixel strip = Adafruit_NeoPixel(150, PIN, NEO_GRB + NEO_KHZ800);
void setup() {
 Serial.begin(9600);
 pinMode(led,OUTPUT);
 //pinMode(ruban, OUTPUT);
 pinMode(photo, INPUT);
 strip.begin();
 strip.show(); // Initialise toute les led à 'off'
}
void all(int temps, int r, int v, int b) {
  for(int i = 0 ; i < 150 ; i++)
 {
    strip.setPixelColor(i, r, v, b);
 }
 strip.show();
  delay(temps);
}
double etalonnage() {
return analogRead(photo);
}
void loop() {
 unsigned long currentMillis = millis();
 double limit = etalonnage();
 limit-=10;
 Serial.println(limit);
 if(analogRead(photo)<limit)
 {
   delay(500);
   while(analogRead(photo)<limit)
   {
     // La première valeur correspond au temps, la seconde  à l'intensité du rouge, la troisième au vert, et la quatrième au bleu
     all(1, 255, 255, 255);
     tone(12,50,2000);
   }
   digitalWrite(led, HIGH);
 }
}
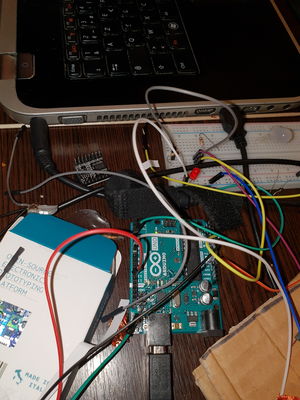
- Câbler l'ARDUINO
- Câbler le ruban de LED


