Boite à mots doux : Différence entre versions
(→Étape 3 : Réalisation de la boite à la découpeuse laser) |
|||
| (4 révisions intermédiaires par 2 utilisateurs non affichées) | |||
| Ligne 7 : | Ligne 7 : | ||
==Description du projet== | ==Description du projet== | ||
| − | La boite à mots doux est une boite possédant un haut-parleur et un bouton poussoir pour pouvoir changer de piste. Dans la boite il y a un Arduino et un lecteur MP3. | + | La boite à mots doux est une boite possédant un haut-parleur et un bouton poussoir pour pouvoir changer de piste. Dans la boite il y a un Arduino et un lecteur MP3. |
| + | |||
| + | |||
| + | [[Image:ImageBoite5.jpg| 400px | Center | 5]] | ||
==Objectifs pédagogiques== | ==Objectifs pédagogiques== | ||
| Ligne 42 : | Ligne 45 : | ||
===Étape 2 : Réalisation du code Arduino === | ===Étape 2 : Réalisation du code Arduino === | ||
| + | |||
| + | <pre> | ||
/// MP3 PLAYER PROJECT | /// MP3 PLAYER PROJECT | ||
| Ligne 178 : | Ligne 183 : | ||
} | } | ||
| + | |||
| + | </pre> | ||
===Étape 3 : Réalisation de la boite à la découpeuse laser === | ===Étape 3 : Réalisation de la boite à la découpeuse laser === | ||
| Ligne 184 : | Ligne 191 : | ||
[[Image:ConstructionBoite.jpg| 400px | Center | Photo de la réalisation de la boite]] | [[Image:ConstructionBoite.jpg| 400px | Center | Photo de la réalisation de la boite]] | ||
| − | ===Étape 4 : Assemblage=== | + | [[Catégorie:enib2019]] |
| + | |||
| + | ===Étape 4 : Assemblage === | ||
| + | |||
| + | Nous avons fixé l'Arduino, et la plaque labdec au fond de la boite, nous avons soudé les câbles au bouton poussoir ainsi qu'au haut-parleur et visser ce dernier. | ||
| + | |||
| + | [[Image:ImageBoite1.jpg| 400px | Center | 1]] | ||
| + | |||
| + | [[Image:ImageBoite2.jpg| 400px | Center | 2]] | ||
| + | |||
| + | [[Image:ImageBoite3.jpg| 400px | Center | 3]] | ||
| − | + | [[Image:ImageBoite4.jpg| 400px | Center | 4]] | |
Version actuelle datée du 31 janvier 2019 à 11:04
Le groupe a décidé de réaliser une boite à mots doux.
Ce projet a été conçu par des élèves de l'ENIB.
Sommaire
Description du projet
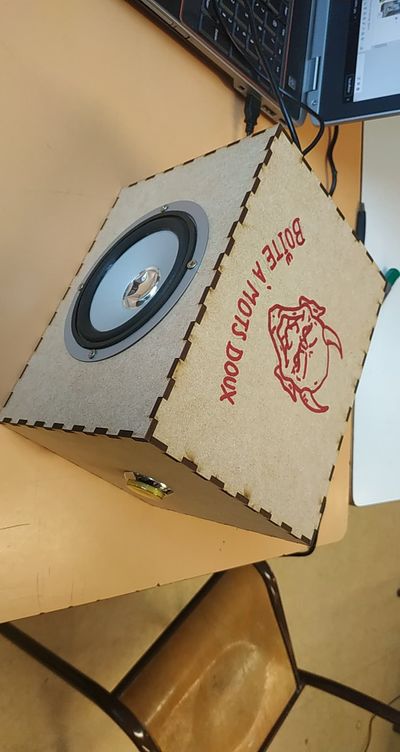
La boite à mots doux est une boite possédant un haut-parleur et un bouton poussoir pour pouvoir changer de piste. Dans la boite il y a un Arduino et un lecteur MP3.
Objectifs pédagogiques
Ce projet a pour ambition de nous faire découvrir de nouvelles façons d'utiliser le numérique et plus particulièrement de pouvoir utiliser un Arduino.
Équipe en charge du projet
- William LE CORRE
- Tony CUILLANDRE
- Damien CRENN
- Quentin LE FRANC
Matériel nécessaire
- Arduino
- Résistance 1k
- Fils
- Breadboard
- Bois
- Découpe Laser
- Colle
- Vis
- Haut-parleur
- cable USB
- Ordinateur
- Lecteur MP3
Réalisation
Étape 1 : Réalisation du câblage Arduino
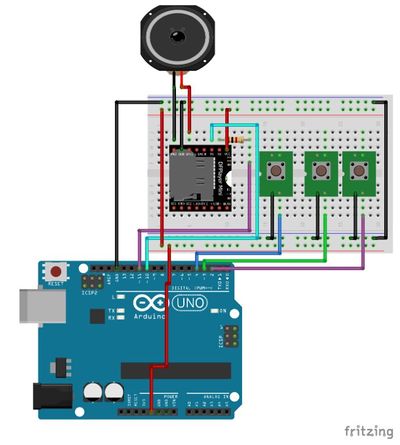
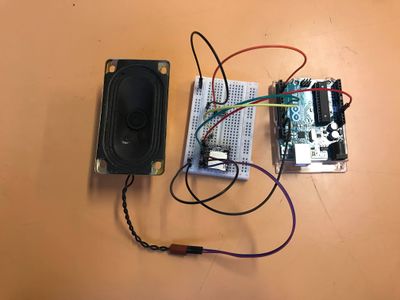
On utilise un Breadboard pour pouvoir réaliser notre câblage. On place le lecteur MP3 dessus ainsi qu'une résistance.
Étape 2 : Réalisation du code Arduino
///              MP3 PLAYER PROJECT
/// http://educ8s.tv/arduino-mp3-player/
//////////////////////////////////////////


#include "SoftwareSerial.h"
SoftwareSerial mySerial(10, 11);
# define Start_Byte 0x7E
# define Version_Byte 0xFF
# define Command_Length 0x06
# define End_Byte 0xEF
# define Acknowledge 0x00 //Returns info with command 0x41 [0x01: info, 0x00: no info]

# define ACTIVATED LOW

int buttonNext = 2;
int buttonPause = 3;
int buttonPrevious = 4;
boolean isPlaying = false;

const int led = 8;

void setup () {

pinMode(buttonPause, INPUT);
digitalWrite(buttonPause,HIGH);
pinMode(buttonNext, INPUT);
digitalWrite(buttonNext,HIGH);
pinMode(buttonPrevious, INPUT);
digitalWrite(buttonPrevious,HIGH);

mySerial.begin (9600);
delay(1000);
playFirst();
isPlaying = true;


}


void loop () {

 if (digitalRead(buttonPause) == ACTIVATED)
  {
    if(isPlaying)
    {
      pause();
      isPlaying = false;
    }else
    {
      isPlaying = true;
      play();
    }
    //contenu du programme

  }


 if (digitalRead(buttonNext) == ACTIVATED)
  {
    if(isPlaying)
    {
      playNext();
    }
  }

   if (digitalRead(buttonPrevious) == ACTIVATED)
  {
    if(isPlaying)
    {
      playPrevious();
    }
  }
}

void playFirst()
{
  execute_CMD(0x3F, 0, 0);
  delay(500);
  setVolume(20);
  delay(500);
  execute_CMD(0x11,0,1);
  delay(500);
}

void pause()
{
  execute_CMD(0x0E,0,0);
  delay(500);
}

void play()
{
  execute_CMD(0x0D,0,1);
  delay(500);
}

void playNext()
{
  execute_CMD(0x01,0,1);
  delay(500);
}

void playPrevious()
{
  execute_CMD(0x02,0,1);
  delay(500);
}

void setVolume(int volume)
{
  execute_CMD(0x06, 0, volume); // Set the volume (0x00~0x30)
  delay(2000);
}

void execute_CMD(byte CMD, byte Par1, byte Par2)
// Excecute the command and parameters
{
// Calculate the checksum (2 bytes)
word checksum = -(Version_Byte + Command_Length + CMD + Acknowledge + Par1 + Par2);
// Build the command line
byte Command_line[10] = { Start_Byte, Version_Byte, Command_Length, CMD, Acknowledge,
Par1, Par2, highByte(checksum), lowByte(checksum), End_Byte};
//Send the command line to the module
for (byte k=0; k<10; k++)
{
mySerial.write( Command_line[k]);
}
}
Étape 3 : Réalisation de la boite à la découpeuse laser
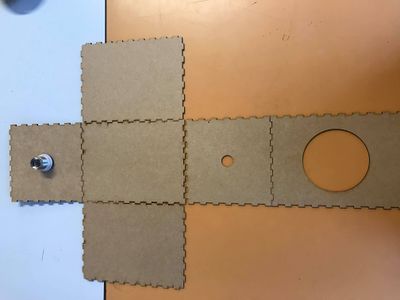
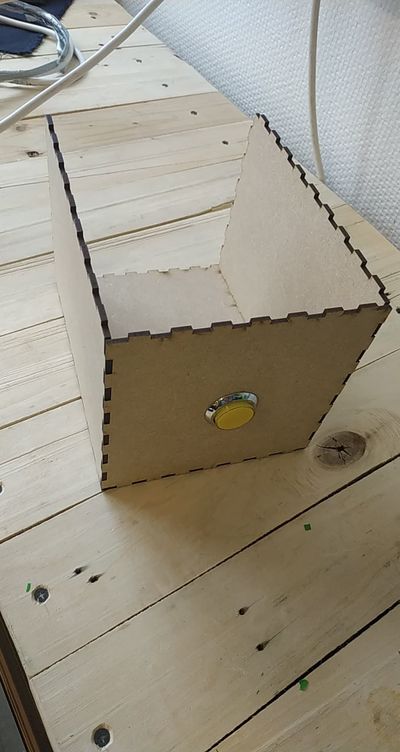
Nous avons réalisé la boite à l'aide d'une découpeuse laser.
Étape 4 : Assemblage
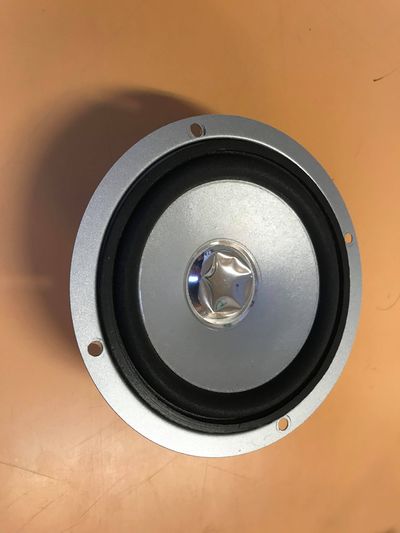
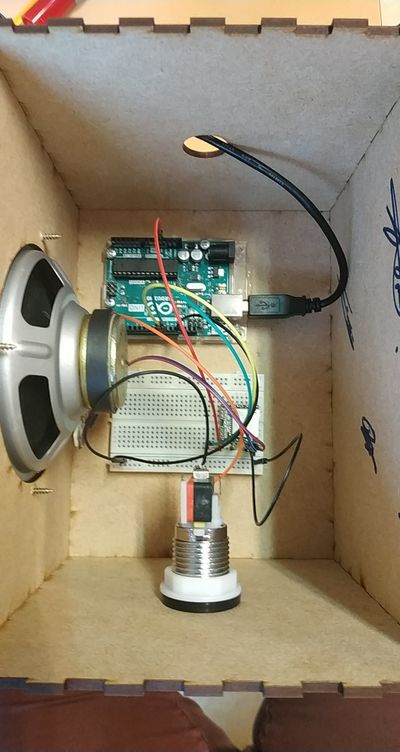
Nous avons fixé l'Arduino, et la plaque labdec au fond de la boite, nous avons soudé les câbles au bouton poussoir ainsi qu'au haut-parleur et visser ce dernier.

